

Welcome to Sinjin’s Ultimate Warlord Strategy Guide: Unleash the Power of Onimusha Warlords. Embark on an extraordinary adventure, venturing through ancient temples and fortresses, descending into the depths of the underworld. Prepare to battle hordes of undead and menacing demonic creatures determined to thwart your mission of rescuing the princess and embracing your destined fate.
Embark on an epic journey as Samanosuke, the formidable warlord and master swordsman, in pursuit of your kidnapped cousin, Yuki. As darkness looms, she has fallen into the clutches of demons, their intentions shrouded in mystery. Your unwavering mission: to locate and rescue the princess by any means necessary. Draw upon your honed skills and vast repertoire of resources accumulated throughout your years of training. Though the path ahead is arduous, remember that you are not alone in this perilous quest. Allies await your call.
Your companion in this perilous journey is Kaede, a skilled kunoichi initially assigned to assassinate you. However, her unwavering loyalty and trust in your cause lead her to join forces with you in the mission to rescue the princess. Although not as mighty as Samanosuke, her remarkable combat abilities prove invaluable in your quest. As you progress, you will have the opportunity to control both characters, harnessing their unique strengths and collaborating to overcome puzzles and navigate treacherous traps. Together, you shall prevail against all odds.
Onimusha Warlords is not just a straightforward action game, as it also features hidden secrets and collectibles throughout the levels. One of these secrets is the 20 pieces of Flourite that you can find and collect. If you manage to collect all 20 pieces, you will unlock a Bonus mini-game called Oni Spirits, which is an arena-based challenge that, if successfully completed, will unlock an Ultimate Mode for the regular game.
However, these pieces of Flourite are not easy to find, as they are virtually invisible on the screen until you obtain the Vision Staff much later in the game. Without this staff, you will have to check every square inch of each level manually to locate these secrets. Fortunately, this walkthrough provides the locations for all 20 pieces of Flourite, as well as detailed level maps that show all of the locations with items and the various color-coded doors.
It’s important to note that the maps provided in this walkthrough are based on the maps found in Onimusha Warlords, but with some creative liberties taken to provide more detail. As such, items shown on the map may not always be exactly where they are in the game. When in doubt, refer to the text for more exact descriptions, and remember to search your surroundings thoroughly.
Whether you’re a completionist looking to collect all the Flourite pieces or just someone who enjoys discovering hidden secrets in games, Onimusha Warlords offers a satisfying challenge for those willing to put in the effort.
Сombat and inventory management in Onimusha Warlords
Samanosuke and Kaede possess distinct fighting styles and unique attack abilities. Samanosuke, a formidable swordsman, wields both his blade and powerful magical attacks to swiftly defeat his enemies. Kaede, armed with a dagger and throwing knives, relies on agility and precision to outmaneuver foes and deliver fatal strikes. Each character has limitations on the items they can use, adding to the strategic challenge.
Shared basic movements and attack commands include:
D-Pad: Basic Movement
- UP – Move forward in facing direction
- DOWN – Quick leap backward
- L/R – Pivot left or right
- R1 – Readies weapon/Locks on nearest enemy
- R2 – Quick 180 turn
- L1 – Block Attack
- L2 – Not used
Weapons
Discover a range of weapons throughout your journey, each serving a unique purpose. The Raizan, Enryuu, and Shippuu are your primary blades, infused with Elemental Magic and connected to corresponding Orbs. Upgrade these weapons and Orbs using Soul Energy obtained from defeated enemies.
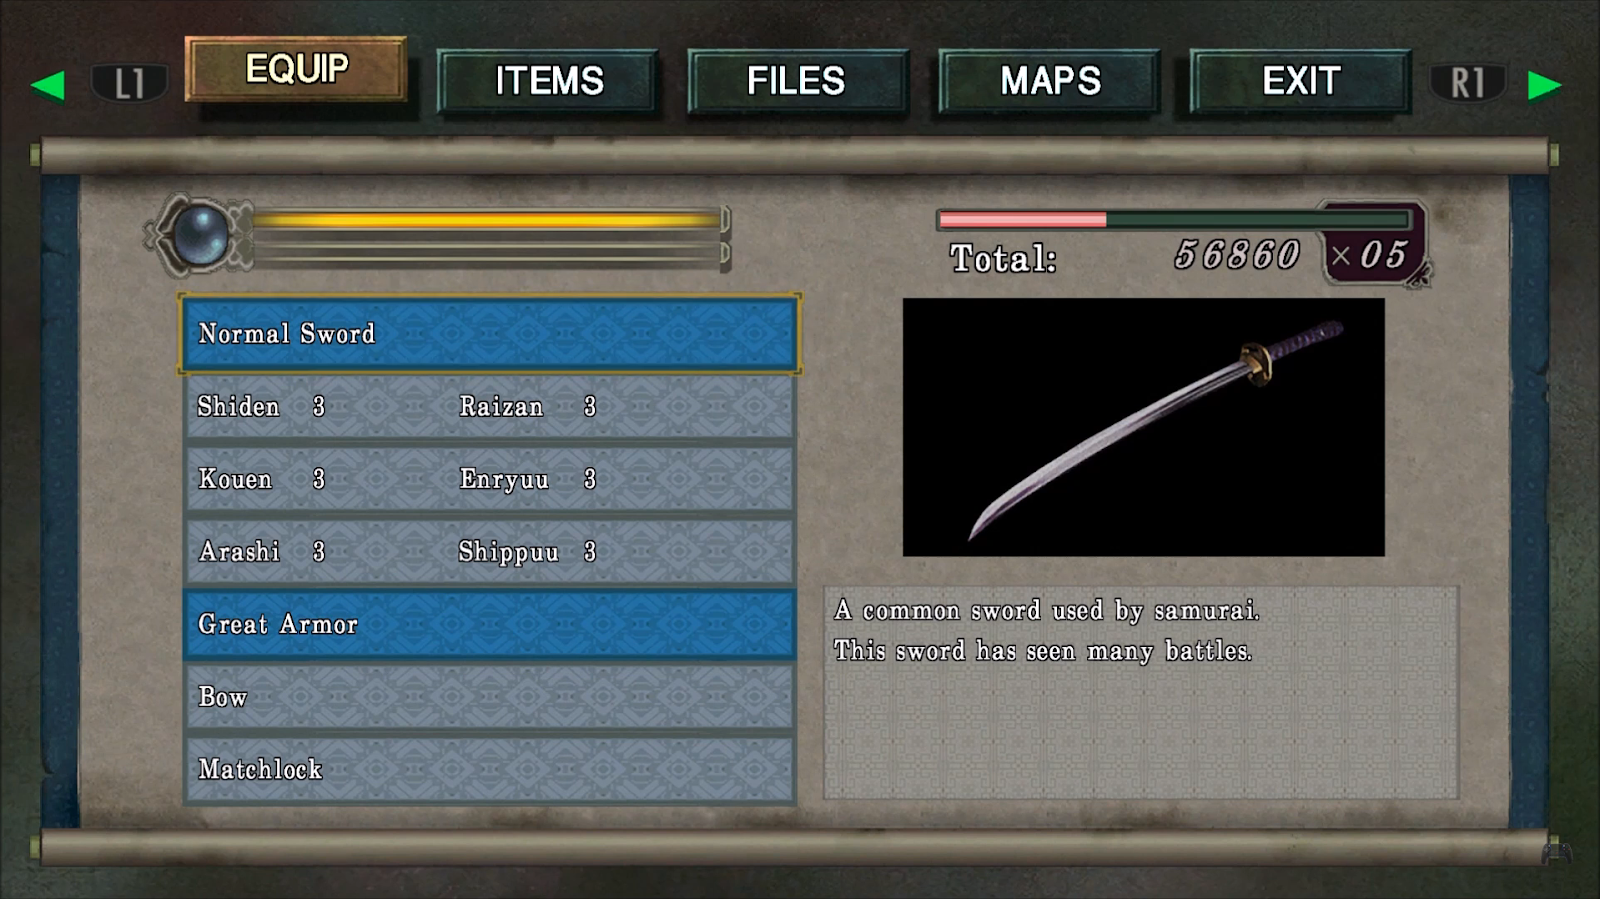
Enhancing the swords amplifies their attack potency, while upgrading the Orbs enables you to unlock magical barriers, granting access to new areas. Seek out the Magic Mirrors scattered across levels to perform these enhancements. Allocate your Soul Energy wisely, prioritizing Orbs to progress through the game. Both Swords and Orbs can be upgraded to a maximum of Level 3.
Equip yourself with the following weapons and explore their various upgrades:
Swords:
- Normal Sword: Modest starting blade.
- Raizan: Sword capable of delivering damaging lightning attacks.
- Enryuu: Powerful sword that delivers deadly flame attacks.
- Shippuu: Faster than a sword but not as deadly. Can summon deadly twisters.
- Bishamon Sword: The most powerful sword combining all three elemental magics.
Range Weapons:
- Bow: Usable with Normal and Fire arrows.
- Matchlock: Powerful firearm shooting single and burst bullets.
- Kunai: Small throwing knives (used by Kaede only).
Ammo:
- Arrows: Normal arrows scattered throughout the levels.
- Fire Arrows: Enhanced with Soul Energy, turning them into Flaming arrows.
- Bullets: Normal bullets found throughout the adventure.
- Burst Bullets: Ammo found or enhanced with Soul Energy for burst shots.
Guide to Inventory Items
As you embark on your quest, you will come across many items that will aid you in your journey. These items can be divided into two categories: common items and unique items. Common items are those that can be found frequently throughout the game, while unique items are found only in specific locations and serve a specific purpose.
To help you keep track of these items, this guide provides a complete list of all inventory items, along with basic descriptions of their functions. Common items are color-coded throughout the guide for easy identification, while unique items are listed separately and keyed to link back to the text describing their location. These unique items are denoted in white text.
Common Items:
- Herb: This item restores a small portion of your health. You can use Soul Energy to enhance it into Medicine.
- Medicine: This is a first aid kit that restores your health to full.
- Magic Jewel: This item increases the maximum amount of magical power you can store.
- Power Jewel: This item lengthens your health bar, making you harder to kill.
- Files: These items include books, journals, and other types of notes that provide story information and puzzle clues.
Unique Items
- Arashi Orb – Unlocks sealed Green Doors and grants Wind Magic.
- Bishamon Ocarina – Flute to reveal secret chamber with Bishamon Sword.
- Blue Key – Opens locked door in Keep Underground.
- Crest Piece (Left) – Part of key to access upper levels of the Keep.
- Crest Piece (Right) – Part of key to access upper levels of the Keep.
- Decorated Arrow – Obtained to acquire Great Arrow and Green Key.
- Decorated Sword – Used to open door to the East Area.
- Evil Plate – Missing half of the key to access the Dark Realm.
- Gear – Missing cog in secret door mechanism.
- Gold Plate – Part of key to access West Prison.
- Great Arrow – Destroys barriers leading to the Dark Realm.
- Great Bow – Used to break barriers leading to the Dark Realm.
- Green Key – Unlocks locked door to boat dock in East Area.
- Kouen Orb – Unseals Red Doors and grants Fire Magic.
- Purifier Bell – Dispels evil spirits.
- Red Key – Opens locked door to the West Area.
- Rope Ladder – Grants access to the dried moat.
- Rosary of Com – Enables communication with the deceased.
- Shiden Orb – Unlocks sealed Blue Doors and grants Thunder Magic.
- Silver Plate – Part of key to access West Prison.
- Soul Absorber 1 – Automatically consumes souls during combat.
- Soul Absorber 2 – Automatically absorbs souls during combat.
- Statue Head – Opens passage to Matchlock.
- Talisman – Restores full health upon death.
- Vision Staff – Reveals hidden Flourite pieces when nearby.
- Wood Ladder – Allows escape from Keep Underground.
Magic Mirrors, Wells, and Soul Energy
Throughout the levels, you will come across Magic Mirrors, serving as both save points and enhancement stations. These mirrors allow you to SAVE your game and utilize your Soul Energy to ENHANCE Swords, Orbs, and other inventory items. Look for purple dots on the maps to locate these mirrors.
Magic Wells are also scattered about, though less frequently. These wells replenish your magical attack meter with an infinite supply of energy. Keep an eye out for white dots on the maps to find these wells and keep your blades fully powered.
When demons are defeated, they release Soul Energy. Act swiftly to absorb it before it dissipates. The energy comes in three types, indicated by the size of the sphere: yellow for healing, blue for magical, and red for normal soul energy. Take caution while collecting during combat as you are vulnerable. You cannot attack or defend while absorbing Soul Energy.
TIP: Gathering yellow energy whenever possible reduces your reliance on Herbs and Medicine, essential for the challenging journey to the Dark Realm Arena.
With this knowledge, your adventure awaits. Embark now on your quest and embrace your destiny as an Onimusha Warlord.
Nanamagari
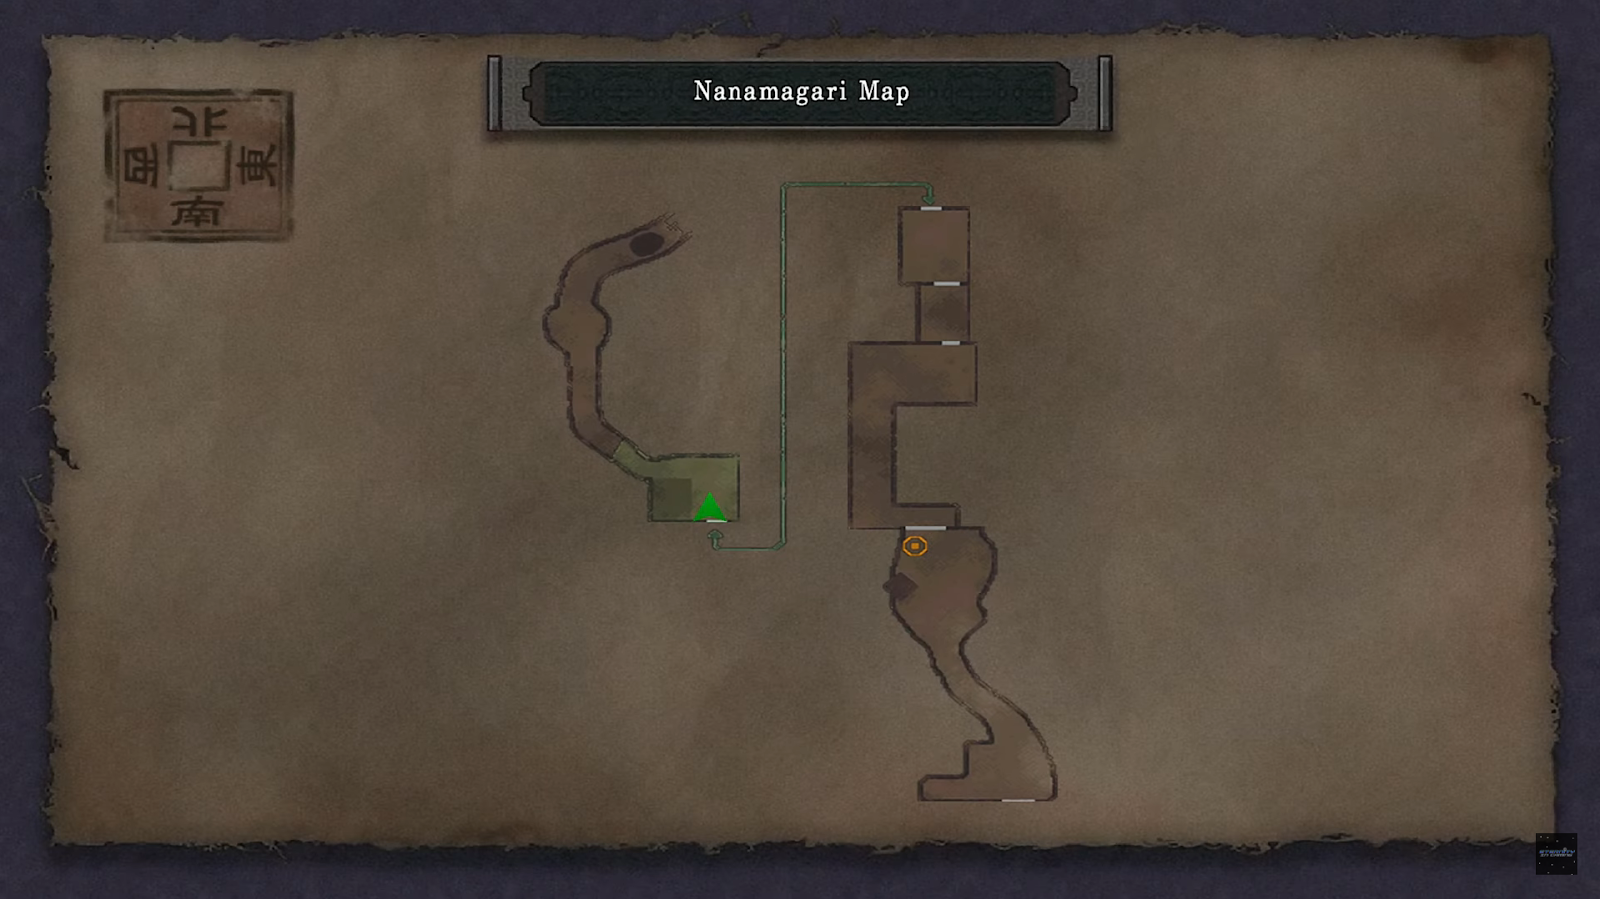
Our heroes are reluctantly forced to separate, with Kaede taking one path while you venture down another. Almost immediately, your instincts prove correct as you come face to face with two sinister creatures dragging the unconscious princess toward a gate. Engaging in combat, you manage to land successful attacks, causing the creatures to flee to the top of a nearby tower.
As you console the princess and ponder the abruptness of the situation, a colossal demon warrior with horns bursts through the trees. Your feeble attacks only serve to irritate the monster, who retaliates by striking you with a mighty club, sending you crashing into the rocks. Losing consciousness, the demon seizes Yuki and vanishes from the area.
During your unconscious state, Spirits of the Ogre Clan pay you a visit. Having fallen victim to the very same demons responsible for Yuki’s abduction, they offer their aid. Bestowing upon you a Gauntlet capable of absorbing the souls of your defeated enemies, they empower your weapons and items with their energy. Before you can decline their offer, you awaken in the “real world” with the Gauntlet firmly affixed to your right arm.
Before proceeding through the large gate, it would be wise to investigate the nearby Magic Mirror. Although you cannot enhance anything at this time, saving your game is crucial, as the challenges ahead will intensify rapidly. Once prepared, pass through the gate.
Turning right, you cross a bridge where crows peck at the lifeless bodies of fallen foes. On the other side, a small group of demonic creatures assaults the villagers. Swiftly attack the group by repeatedly pressing the attack key and using R1 to switch targets after defeating one. This method is faster than performing a 180-degree spin and allows for a smoother transition to the next adversary. Enter the first room, followed by the next, where you become ambushed by more demons. The villagers, having locked you in, leave you with no choice but to defend yourself.
Once the villagers release you and offer their apologies, they reveal the hidden path leading to the keep. Follow the wooded path, only to be ambushed by a few more demons. Collect the Herb located to the right of the cave entrance, then proceed inside as the cave collapses and bats swarm around you. Confirm your decision to descend into the hole, bringing this short level to an end.
Underground Temple
Proceed through the winding passage, prepared to face the demon that ambushes you around the first blind turn. As the cave opens up, you find yourself in a sprawling underground temple, where more demons lurk and attack from the sides. To the left of the stairs, you discover a chest containing the Temple Map. Ascend the steps and inspect the mummified monk. Moving the green scroll reveals a secret door as the entire pedestal slides away.
As you enter, demons await you inside, launching an assault from both sides. Eliminate them all and then proceed to the right to explore a short dead-end hallway. At the end of the hall, open the cabinet to obtain the Seiryu item and discover hidden Flourite #1 in the opposite corner. Now, make your way to the door around the next corner and enter a long room adorned with pottery. Shatter the urns with your sword to unveil a chest containing Journal #1.
At the far end of this room, you’ll encounter a blue sphere. Touch the Shiden Orb to imbue your blade with the power of thunder and lightning. Take the northern passage and observe a chest in the alcove to the right. This chest happens to be your first Trick Box. To unlock it, you must arrange the numbers in sequential order within a limited number of moves. The numbers are grouped in sets of four and rotate in a clockwise fashion. In this instance, you need to move the LEFT group, then the RIGHT group, and finally the LEFT group once more. Your reward for solving the puzzle is the Rope Ladder. Ascend the stairs at the end of this passage to exit the level.
South Area
At the top of the steps, you can spot a chest hidden behind the bushes on the right. Open it to acquire the Magic Jewel. Since there’s no need to save it, access your inventory and use the jewel to expand your magic bar. Now, proceed down the alternate path that leads to a door sealed with a blue magic lock. Before entering, it’s advisable to visit the Magic Mirror and examine the Trick Box. This particular box requires you to enter a phrase. You can find the necessary information by reading the books and notes you’ve collected, or you can simply select phrases 1-3-6 (from left to right) and confirm your selection to unlock the box and obtain a Power Jewel.
Deactivate the lock, open the door, and step inside. You find yourself on a wide, empty bridge, but as soon as you begin crossing it, various demons start warping in. Engage in combat until the demons cease appearing, then move to the north side of the bridge. Smash the wooden barrier to the right of the door, revealing a chest. Inside, you discover the South Area Map, which you can collect before proceeding through the next door.
Now, you find yourself in a bustling courtyard. This area is teeming with monsters that continuously warp in waves. Although they eventually stop spawning, you may not be sufficiently powerful to defeat them all at this stage. Fight as many as you can handle, then head through the door in the northwest corner. Be prepared to face the Bull Ogre, who guards this door and wields a formidable giant axe that he can throw at you.
The next area features several demons attacking a soldier. Dispatch the demons and save the soldier, who will reward you with a Herb and provide a clue leading you to a section of the broken wall. By using your rope ladder, you can descend into the dried moat below. A couple more demons will assail you in the area just outside the cave entrance. Defeat them, then enter the cave to find another Magic Mirror and a Trick Box. The correct phrase to enter is 6-1-4, and your prize is a Power Jewel, which will prove useful shortly. Feel free to use it now. Before entering the door, follow the side passage and smash a crate to reveal a chest containing some Medicine.
Proceed into the next large room, where you confront the large demon who previously knocked you out and abducted Yuki. He is not overly challenging to defeat. Wait for him to charge, then circle-strafe around him and attack from the side or back. Maintain a safe distance from his powerful club and always retreat a considerable distance before attempting to absorb any Soul Energy he releases while you engage him. A few strikes with your Thunder attack should bring him down. As he falls, he crashes through a door, revealing your next destination.
Inside the first room beyond the door, you find a chest containing Journal #2. Proceed through the door into the subsequent area, where the passage turns right. To the left, you come across several large urns. Smash them to acquire Flourite #2. Remember, the Flourite is not immediately visible, so press the interaction button (X) as you move around until you collect it. Now, progress down the eerie hallway lined with skeletons and enter the following room.
This room serves as the laboratory of a deranged Demon Scientist who seems to be experimenting with someone’s liver. After a brief conversation, he summons Reynaldo and departs. Beware of his tentacle attacks that can emerge from the floor to grab you. One or two blasts from your Thunder attack should send this creature back to the underworld, allowing you to claim the Kouen Orb. This orb grants you a new Fire attack and the ability to open red magical locks.
It’s time to return to the courtyard, but many more demons will spawn, making this a challenging journey. As you pass through the large room where you defeated the Bull Ogre, you notice numerous floating creatures absorbing Soul Energy. These creatures can be bothersome in various ways. Firstly, they can immobilize you while other creatures assail you. While holding you, they also slowly drain your magical energy. Lastly, if any of these creatures are present while you’re fighting other monsters, they will absorb the Soul Energy before you can. My advice is to avoid these creatures and keep a wide distance from them. If they start moving toward you, retreat—especially if other monsters are nearby. If you’re feeling daring and decide to fight these creatures, they are relatively easy to kill (often requiring just one hit). However, they can be challenging to strike since they float, and upon killing them, you’ll receive a substantial amount of Soul Energy as a reward.
Utilize your new Kouen Orb to open the red magical lock and return to the dry moat, where more of those eerie ninjas with glowing green eyes will attack. Ascend the rope ladder to encounter another Bull Ogre guarding the door, with one of the soul suckers floating above him. Lead the Bull Ogre away from the door and dispatch him swiftly. If you manage to stay closer to him than the soul sucker, you may absorb his energy before it does. Return to the courtyard, where more demons appear, including another Bull Ogre who guards the door to the Keep.
The Keep
The Keep is a sprawling, multi-level structure filled with demons waiting to be defeated. As you enter, start by dealing with the demons in the main room. Be cautious of the Samurai, who is particularly tough and can grab you by the throat, causing significant damage. Once the room is cleared, you have several doors to choose from.
The door in the southwest corner leads to a hall infested with demons, culminating in a double-blue locked door. The large doors on the north wall lead deeper into the keep, but before proceeding, make a quick detour through the northwest door. Inside, you’ll find a Magic Mirror and your first Magic Well. Additionally, there’s a chest containing a Keep Map. In the south part of the room, something strange occurs—a peculiar-looking man drops from the ceiling, says nothing, and vanishes. Make a note of this location as it will be significant later in the game. Return here when instructed.
After saving your progress and enhancing your abilities, return to the large room, which is now repopulated with new demons. Get used to this as the room will always have a fresh wave of monsters each time you enter. You can choose to fight them or simply ignore them and proceed through the north doors. Inside, you’ll witness a struggle between a short man and a small boy. The boy manages to escape when you enter, and you can have a conversation with the man, who reveals himself as Kinoshita. After he leaves, search the nearby chest to obtain Journal #3.
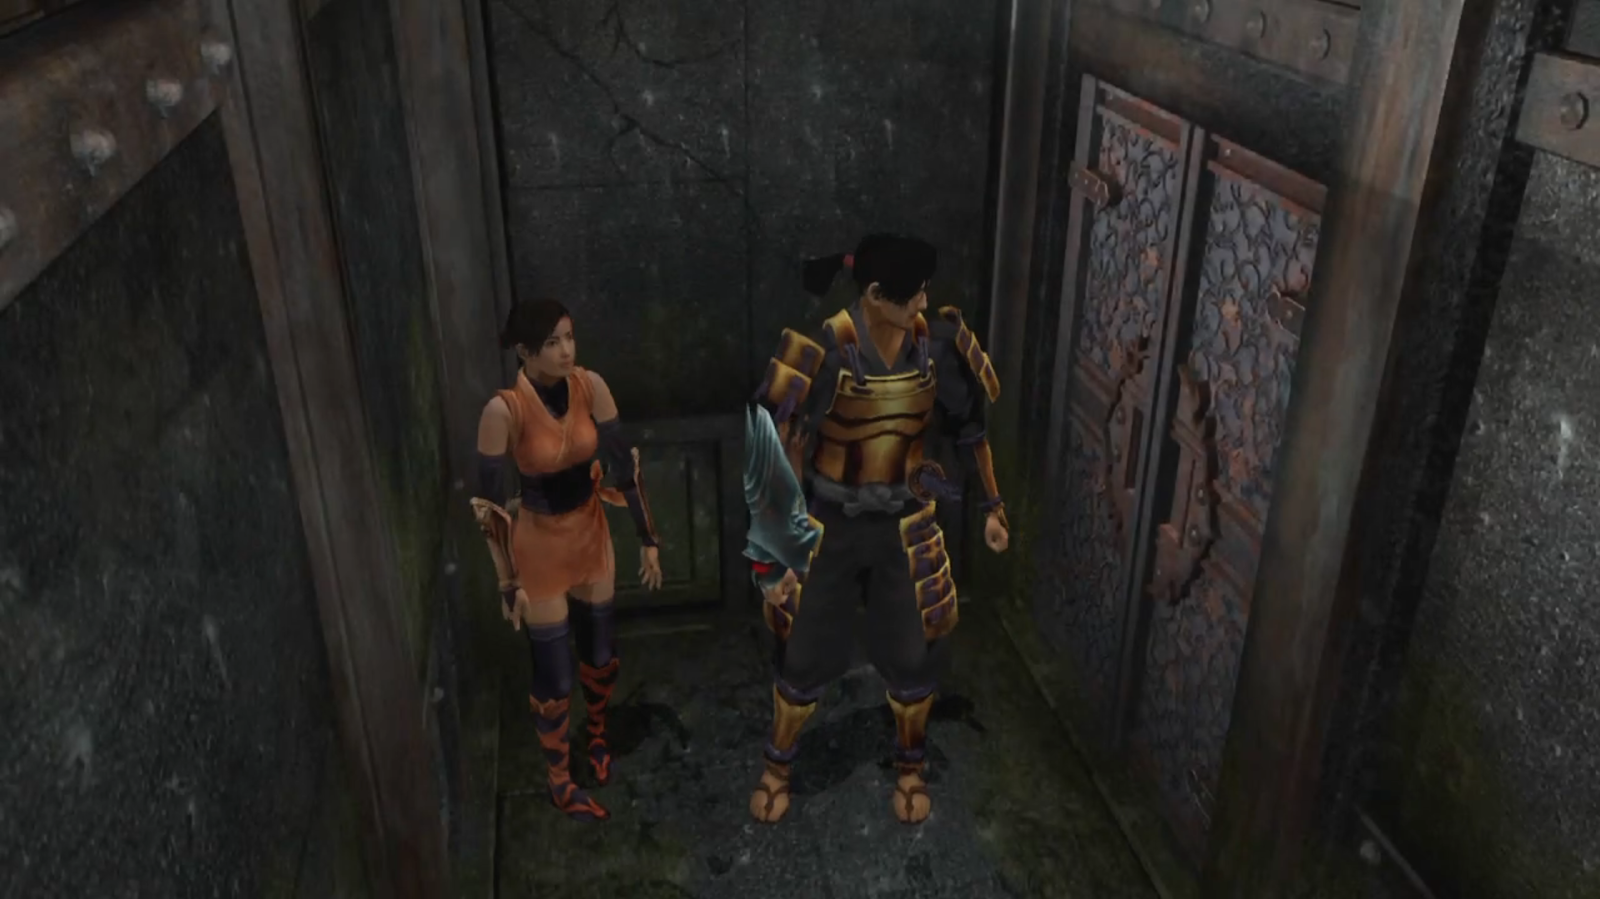
Unlock the next red door and proceed through it to encounter the small boy again, as well as reunite with Kaede. After another brief conversation, go through the subsequent door, which leads to a long hall. On the north wall, you’ll find a strange door sealed with a symbolic plate, with a part of it missing. This door leads to the end of the game, so you don’t need to worry about it for now. Continue through the hall, defeating any attacking demons along the way. Eventually, you’ll reach a set of stairs leading upward.
Before ascending the stairs, go through the door on the south wall and open the Trick Box. It’s a number lock, so move the groups in the following order: LEFT-RIGHT-LEFT-RIGHT. Inside the box, you’ll find the Bow. Grab the Suzaku book, being careful not to swing your sword near the rope. Return to the stairs and open the chest to acquire another Herb. Above the chest, hidden on a shelf, you’ll find Flourite #3.
Now, proceed upstairs and enter the door on the right. Head toward the rope and search the bucket to discover a Power Jewel. Return to the L-shaped hall and go around the corner, where you’ll face demons, samurai, and ninjas. This location will respawn enemies each time you visit, so always be prepared, especially for the ninjas who tend to jump at you from off-screen.
The door on the north requires a Level 2 Orb. If your Kouen Orb is powerful enough, you can enter this room and obtain the Red Book from the table and the Right Crest Piece from the chest. If not, return later when you can unlock the door.
Now, head across the hall and go through the door to reach a balcony overlooking the room below, where a battle is taking place between soldiers and demons. Assist the soldiers by using your new bow to snipe at the demons from the marked location (x). Adjust your position as necessary to shoot the demon attempting to hide under the balcony. Once you’ve defeated the demons and saved the soldiers, they will reward you with a Herb and a Magic Jewel. The only catch is that you’ll need to descend and retrieve the rewards, which means fighting various demons on your way down and back to this location.
Move around the balcony to the west door and unlock it. Continue up the stairs, defeating any demons blocking your path. Smash the crates to reveal a chest containing Arrows. Also, search under the stairs to find Flourite #4. Proceed up the stairs to reach the third level of the Keep.
This level is very challenging, featuring three puzzles with no opportunity to save until after completing all three. The final puzzle is on a strict timer and can end the game, so it is highly recommended to use the Magic Mirror to save your progress. Take a moment to check the chest for more Arrows and collect the Byakko before going through the double-red locked door.
You reunite with Kaede just in time to solve a clever puzzle that requires the cooperation of both characters. Once the first gate slams shut, you can pull the lever to open it and then switch control to Kaede. Have her proceed to the next set of levers and pull the right one. Now, switch back to your character and follow suit by pulling the left lever, allowing Kaede to access the next group of levers. It is crucial not to pull the middle lever! Instead, have Kaede pull the left lever, enabling you to access the chest in the corner, which contains the Holy Armor. This armor is not an automatic upgrade, so remember to equip it from your inventory. Continue following Kaede and pull the right lever. Finally, have Kaede either pull the next lever or open the door—either action will lead both of you into the next room.
As you enter the next room, you sense a trap and quickly push Kaede through the door just as it slams shut, sealing you in a water-tight chamber that begins to fill with water. It’s now up to Kaede to save you, and depending on the game’s difficulty level (Easy/Normal), you have anywhere from 30 to 90 seconds to solve this puzzle.
Once Samanosuke is freed, you can exit through the south door. Head to the opposite corner of the room and pull the cord (c) to deactivate previous traps and lower the stairs leading up to level 4. Kaede will venture off on her own, leaving you to explore the rest of the Keep by yourself. At the top of the stairs, you’ll find a large door with a circular indentation, a perfect match for the Crest piece you found earlier, but you still need the left half.
In the corner, there’s a ladder leading back down to level 3. Descend from this point to a hidden room on level 2, where you’ll discover a chest containing the Left Crest Piece. Additionally, smash the wooden panel on the wall to reveal Journal #4. Climb back up the ladder and exit on level 3. Follow the hall until you reach another ladder leading down to level 2. At the bottom, you’ll find a chest with a Power Jewel and a passage that leads to a secret door, opening back to the room where you found the first half of the Crest.
Make your way back to the door on level 4 and insert both Crest halves to unlock it. Open the door and enter. Grab the Seiryu from the east wall and the invisible Flourite #5 directly across from it. Continue to the next room and obtain the Suzaku. Then, go to the narrow gap behind the stairs to find a chest with some Arrows. Head up the stairs.
Follow the perimeter walkway, dealing with the ninjas that leap at you from all directions. Enter the door on the south side and search the large room. Get the Seiryu and open the chest to add some Medicine to your inventory. Smash the decorative screens to reveal an altar on the left and a concealed passage on the right. Use the altar to absorb additional Soul Energy, then head into the passage to find a Magic Mirror. The ladder at the opposite end of the passage leads to a powerful boss battle, so it’s advisable to save your game at this point.
When you reach the roof, you’ll face a formidable warrior with a devastating wind attack. Circle strafing is the most effective tactic for this battle. Wait for him to charge, dodge out of the way, and strike from the sides or behind. Utilize your block (L1) to deflect his wind and sword attacks, and use Fire and Thunder attacks to defeat him. Remember to create distance before absorbing any Soul Energy during combat. When he is defeated, he’ll leave behind large amounts of energy and the Arashi Orb.
Now, equipped with the power of Wind, you can open green doors. Start by opening the one on this level. Descend the ladder from the roof and head back outside. Continue along the walkway past this door to reach another door locked with a green seal. Utilize your new power to open this door and enter. Take note of the chest in this room, and then watch the movie. After it concludes, you’ll all be downstairs on the main floor.
You now have the option to go all the way back to the 5th floor and open that chest. Inside, you’ll find Burst Bullets, which may not be exceptional, but the demons along the way will provide valuable amounts of Soul Energy. Plus, there are a few other surprises waiting for you if you decide to make the trip.
Your next goal, whether you obtain the chest or not, is to reach the Keep Underground. Return to the main room of the Keep (where you first entered) and take the southwest door that leads to the double-blue locked door. By now, your Shiden Orb should be powered to level 2, allowing you to easily unlock this door. Proceed through the next room and enter another one where a pedestal with three colored orbs awaits. You’ll need to cycle through all three of your weapons to activate each orb and gain access to the Keep Underground. Descend the stairs to conclude this level.
Keep Underground
Take the first right turn you encounter. If you continue straight, you’ll reach a door obstructed by cursed spirits, making it impassable. Instead, follow the branching path back around to find another door. Upon entering the next room, you’ll come across a Magic Mirror just inside the door, and a nearby chest containing a Herb.
Slash your way through the tentacles and collect the Byakko, Orange Book, and Green Book. Proceed through the door and eliminate the tentacle creatures roaming the halls. Enter the first door on the left, open the chest, and obtain the Keep Underground Map. Move to the south wall of the room and locate the rope (r). Slash it with your sword to tip the scales. Now, make your way around to the other side and retrieve the Rosary of Com (R).
Leave this room and continue north, battling more tentacle creatures along the way. Enter the next door and head to the far side of the long room to obtain the Purifier Bell (b) from the chest. Triggering the swinging blade traps, you must navigate them to exit the room. The key is to stay to one side, allowing for more time before the blade returns. Move past one blade at a time, pausing between blades to get the timing right.
Now retrace your path all the way back to the starting point, fending off the newly spawned monsters as they replace the ones you previously defeated. Once you reach the cursed spirit door, use the Purifier Bell to calm the haunted spirits and gain passage. You’ll find yourself in a hall lined with glass cases containing Samurai. As you progress down the hall, several cases will burst open, and the Samurai will attack. It’s not the most surprising turn of events, is it?
Ignore the right path and proceed through the door directly ahead. This room is populated with more tentacle creatures. Watch for the moving mist or fog, as it indicates where the tentacles will emerge from the ground. Unlock and enter the green door, and acquire Flourite #6 from the iron maiden. Speak to the man and obtain the Byakko. Don’t forget to check out the Trick Box, which features three sets of moveable numbers. Rotate them in the order MIDDLE-RIGHT-LEFT to open the box and obtain the Blue Key.
Exit the room and engage in battle with more tentacle creatures as you make your way to the eastern door. Enter and collect the White Book and Herb from within the chest. Then return to the hall of Samurai and head east. The locked door requiring the Blue Key can be found on the south wall. However, before unlocking it, retrieve Flourite #7 from the northeast corner of this hall. Now, unlock the blue-key door and watch the concluding movie for this level.
West Area
This is your first opportunity to control Kaede. Leave the Keep and obtain the Red Key from the injured soldier along the way. As you exit the Keep, you’ll encounter numerous demons and zombies, both outside and within. Keep in mind that Kaede is not as strong or powerful as Samanosuke, so you may want to avoid certain encounters. Remember to conserve healing items for Kaede, as you’ll want to stockpile them.
Return to the area where Samanosuke previously used the rope ladder in the game. Locate the door marked with red ink. Several green-eyed ninjas will appear in the area. Utilize your newly acquired Red Key to open the door and enter the West Area. If one or two ninjas become bothersome, eliminate them. Proceed to the chest and retrieve the Herb.
Continue along the path and pass through the next door, following its route. The section near the triple-locked blue door is heavily guarded, with at least one Samurai present. Employ the flip/twist/slash move to dispatch them swiftly. To the right of the blue door, you’ll find Flourite #8. Keep following the path, passing by the well (w). Note that the well serves as another entrance to the Dark Realm Arena, but that is a task for Samanosuke.
Proceed through the door into the next area, which happens to be a target range for zombie archers positioned on a balcony to the north. Demons and a Samurai also roam the ground level. It may be wise to swiftly climb the northern ladder and eliminate the archers to prevent them from attacking from above. Upon rescuing the soldier below, he will reward you with a Soul Absorber. Now, you can enter the door on the west wall, just south of the ladder.
The tranquil atmosphere of this enchanted glade, adorned with fireflies, is disrupted as more green-eyed ninjas leap at you from the trees. Dispatch them swiftly and continue along the path, ensuring you collect the Kunai located on the outside of the turn. Look for the sparkle, and you may need to adjust your position to pick them up correctly. Proceed until you reach a locked door. Utilize the Shinobi Kit to automatically pick the lock and enter.
Inside, you’ll find a Magic Mirror to save your progress. Take a moment to do so, then examine the Trick Box. Use the sequence 5-7-2 to open the box and obtain the Magic Jewel. Although you can’t use it now, Samanosuke will be able to utilize it when you regain control of him. Exit through the back door and search the body in the southeast corner to obtain the Gear (G).
Since you cannot proceed further west at the moment, retrace your steps back to the balcony with the archers, dealing with any enemies that come your way, or avoiding them if you prefer. Climb the ladder to the balcony and enter through the door. Cross the catwalk and descend the ladder, where you’ll find a Magic Mirror and a Magic Well. Search the chest to acquire a West Area Map, then proceed to the south door and open it using your Shinobi Kit.
Follow the street as it leads south and then turns east. You’ll encounter several zombies and possibly a Samurai along the way. Make your way to the far eastern end and enter the door on the left (north). Just inside the door, on the right, there is a cleverly concealed chest hidden behind a screen. Open it to obtain the Herb. Move to the back of the room, where you’ll find a Suzaku atop a bookshelf and another chest containing Journal #5. Locate the shelf on the east wall to reveal a secret compartment containing several gears. It appears that one gear is missing, so insert the Gear you obtained and pull the string to reveal a secret room. Search the statue on the east wall to find hidden Flourite #9, and then open the chest to obtain the Silver Plate. On your way out, grab the Byakko.
Return to the street and enter the south door across from you. Stick close to the east wall to avoid the shooting jets of fire. Locate the chain (C) in the corner and pull it to open the door across the way. Keep in mind that this door operates on a timer and will close shortly. With a good camera angle, observe the pattern of fire and time the pull on the chain so that you can open the door, quickly cross, and enter the room. The game animation tends to pause between each jet of fire, so keep the D-pad pressed forward. Once inside, collect the Gold Plate and smash the crates in the corner to reveal another Herb. Finally, pull the chain (c) to permanently deactivate the fire jets and open the door.
Now, prepare for the long journey back to the prison area, where you obtained the Gear from the deceased soldier. Plenty of demons will attempt to impede your progress. Fight or avoid them as necessary until you reach the large door blocked by a gate. Use the Silver and Gold Plates on either side of the door to raise the gate and enter the prison area.
Inside, you’ll encounter several large fires that must be avoided as you explore the rooms and engage in a few battles with demons. Pushing the demons into the flames is an effective way to eliminate them with minimal combat. Make your way down the long western corridor to search the back room, where you’ll find the Genbu and some Kunai in a chest. Return to the main room and proceed through the south door.
Search the barrels near the bottom of the stairs to find Flourite #10, then ascend the stairs to find the Trick Box. Rotate the groups in the following order: MIDDLE-LEFT-LEFT-RIGHT-RIGHT to open the box and obtain the Sacred Dagger, Kaede’s only additional weapon. Equip this new blade from your inventory and enjoy the glowing red effects as you wield it. Descend the stairs and take the other set of stairs leading to the dungeon.
Proceed through the passage, slicing through the tentacles obstructing your path, and enter the large room. Move towards the back and attempt to open the cell door, triggering a cinematic. However, this quickly turns into a challenging battle against a new adversary, the Cloaked Ninja. This enemy possesses the ability to partially turn invisible and teleport, making it difficult to lock onto for attacks. Always keep an eye on their ghostly image and swiftly turn to face their new location before launching an attack. Block their strikes when necessary, and with persistence, you should defeat them.
Now, we shift our attention to our other hero who finds themselves in eerie caverns beneath the Keep. While a map may not be essential for this brief encounter, the three areas on the Keep Underground Map in the previous section are included for reference.
At this point, I highly recommend using the Magic Mirror to save your game. You are about to face an immensely challenging opponent—yourself! It would be wise to utilize any magic or power jewels collected by you or Kaede thus far, enhancing your weapons and perhaps converting an Herb into a Medkit. When you feel prepared, head north into the combat cavern and confront your doppelganger.
This battle requires patience. Avoid launching direct frontal assaults, as your doppelganger will effectively block most of them. Instead, wait for them to charge, then employ circular strafing to attack from the sides and rear. Make use of your magic attacks until their power is depleted, then switch to another weapon and repeat the process. You can also block their magic attacks to absorb Soul Energy released.
Once you have triumphed over your “evil self,” proceed into the next chamber to acquire the Wooden Ladder and the Evil Plate from two chests. Enter the circular area and use the ladder to return to the Keep.
Now, you face a decision. With the Evil Plate in your possession, you gain access to the Dark Realm Arena. To enter the Dark Realm, you can either return to the save room on the first floor of the Keep or visit the Well located in the West Area. Before making a choice, consider reading the section on the Dark Realm Arena to determine if you are adequately prepared for the challenge. For now, let’s continue with the ongoing mission.
It’s now Samanosuke’s turn to explore the West Area. Proceed to the red-ink door and enter. Expect numerous demons and zombies lying in wait, including several archer zombies positioned on the rooftops. Use your arrows to shoot them down. Save the soldier who is under attack by demons, and in return, he will provide you with Burst Bullets.
Make your way to the blue triple-lock door and enter. You’ll encounter a glowing statue (S) from which you can absorb Soul Energy. Take note of the headless statue, then retrieve the Herb, Genbu, and Vision Staff from the chest. With the staff in your possession, all Flourite items will now emit a noticeable glow, making them easier to locate. In fact, backtrack a bit outside to the previous section of this level and find Flourite #11 hidden along the right wall.
Proceed to the archery area, eliminate more demons, and climb the ladder. Slash your way to the door, enter, and descend the ladder inside to reach the room with the Magic Mirror and Magic Well from before. Break the seal on the red door and head north. As the path widens, you’ll notice four zombies at the bottom of the hill. Cut the rope on the catapult to send it rolling down, crushing all but one of the zombies. This action also reveals the location of Flourite #12.
Deal with the remaining zombie and enter the door leading to the next area. Here, you’ll face several large Bull Ogres, along with one particularly massive one. Equip your Enryuu and unleash the power of fire on the three smaller Bull Ogres. It may take two or three strikes to defeat them all. Now, focus all your attention on the remaining giant Ogre. Switch to your Raizan and unleash devastating lightning attacks until it is vanquished. Search the area to claim your treasures, including the Decorated Sword, Statue Head, and some Bullets.
Proceed to make your way back to the keep, slaying plenty of monsters along the way. When you reach the blue triple-lock door mentioned earlier, enter it and place the statue head onto the headless statue, disarming the trap. Now, proceed through the back passage and open the chest to obtain the Matchlock. Have some fun shooting down the zombie archers from the rooftops as you make your way back to the keep.
Enter the keep and head towards the entrance to the Dark Realm. Insert the Evil Plate into the door to gain access. After a captivating cinematic, you and Kaede must once again part ways to search for a means to overcome the supernatural barrier preventing entry into the underworld. Exit the Keep and head to the southeastern corner to witness an encounter between some soldiers and several giant insects bursting through the door. Eliminate these creatures, then approach the pedestal and place the Decorated Sword into the socket to lower the stone, revealing the door leading to the East Area.
East Area
The East Area presents distinct paths tailored for Samanosuke and Kaede, with their unique abilities. Eventually, you will reunite to confront the boss at the area’s conclusion. Presently, proceed along the walkway towards the north, then turn east, bypassing the left branching path, until you reach a green locked door. Exercise caution, as samurais will stand guard along the upcoming sections of the walkway.
Continue south, disregarding another left branch, until you reach a raised bridge. To lower the bridge and cross over, shoot the rope located to Samanosuke’s left. Take a moment to explore the area, locating a chest containing Bullets and removing the board concealing a highly valuable Talisman. Return to the previous branching path and head east, acquiring Journal #6 along the way. Enter the door to proceed to the next section.
Dispatch or evade the samurais on the walkway and make your way to the far end, where a door awaits. Enter and obtain the Genbu item, then open the chest to acquire additional Bullets. Smash the wooden panel to discover the East Area Map. Return to the walkway and enter the door you previously passed. This will lead you to the bell tower.
Upon entering, a chest just inside the door will provide you with Bullets. Ascend the spiral ramp leading to the roof. While advancing, be sure to block the arrows fired by the archers until you are within striking range. Once on the roof, prepare to combat multiple ninjas. Proceed through the broken railing onto the roof, engaging in a thrilling moonlit battle. Explore the rooftop to acquire a Soul Absorber, Magic Jewel, and do not forget to retrieve Flourite #13 on your way back to the ladder.
Descend the ramp and proceed through the green locked door located at the back. You will find yourself by the bank of a serene pond, inhabited by swimming fish and perilous ninjas. Head towards the east, engaging in combat with the ninjas, and pass through the first gate. Prepare for another wave of ninja attacks. Once you have defeated them, approach the idol (S) and infuse your Gauntlet with Soul Energy. Progress through the next gate and follow the path that leads to a resounding waterfall.
Expect further enemy encounters. Disregard the bridge and instead follow the path concealed behind the cascading water. Find shelter in the alcove on the right and unlock the Trick Box. This particular box consists of four sets of movable numbers. Utilize the combination: BOTTOM-LEFT – TOP-RIGHT – BOTTOM-RIGHT – BOTTOM-LEFT – BOTTOM-RIGHT to obtain the Great Armor. Remember to equip this newly acquired item from your inventory. Proceed towards the door and confront the Samurai. Swinging your sword near the bridge will sever the ropes and cause it to collapse.
Enter the nearby door to discover a Magic Mirror and a Magic Well. Another Trick Box awaits, requiring a two-phrase solution this time. Enter phrases 3-6 to unlock the box and obtain a Magic Jewel. If you have been utilizing all the jewels as you come across them, both your magic and health bars should now be at maximum length. Collect the Medicine from the chest and make your way down to the dock, where you can find Flourite #14 before boarding the boat.
After a brief journey, you will arrive at the building situated in the middle of the lake. Enter the structure and cross the planks to reach the other side, where the Great Bow awaits you on an altar. This triggers a cinematic sequence that transfers control to Kaede.
Kaede commences her journey at the starting point of the East Area map. Opt for the first left path and skillfully pick the lock on the door. Follow the walkway, eliminating the insects that emerge from the water to attack. Proceed to the first right branching path and enter the eastern door. Inside, you will discover Flourite #15 and a sizable statue concealing a Herb. In the small area behind the statue, Apocalypse #2 awaits. Return to the walkway, eliminating more insects as you progress towards the next locked door. Employ your lockpicking skills and enter.
Now you find yourself outside, near the fish pond encountered earlier. Prepare for further insect and ninja confrontations as you navigate towards the waterfall area. Once you reach the building where Samanosuke boarded the boat, you can pick the lock on the north door and access a new section. Beware as zombies emerge from the water, engaging you in battle. Continue around until you locate the right door. Enter and face more zombies and a formidable Samurai. Search the chest to acquire a supply of Arrows.
Proceed through the subsequent door. The hallway splits, with the left path leading to a locked door that cannot be picked. Opt for the right path in search of the key. In the first small room, you will find a Magic Mirror and a ladder that ascends to a loft where Flourite #16 is located. Smash the crates to discover a Herb, then descend the ladder and pass through the next door.
Upon entering, immediately utilize the L1 button to block. An archer positioned at the far end of the walkway will unleash a barrage of arrows. Another zombie will attack from the side. With well-timed blocking, you can utilize the archer’s shots to strike the zombie in the back as they attempt to assault you. Progress towards the other end of the walkway, blocking as necessary until you are within range to strike the archer with your dagger. For now, disregard the door on the east wall and proceed north, entering the west door.
Collect the Herb and Flourite #17 (the final Flourite in the main game). Ascend the ladder and locate the Trick Box. This particular box comprises three sets of numbers. Rotate the sequence: LEFT – LEFT – MIDDLE – RIGHT – RIGHT – MIDDLE – MIDDLE to unlock the box and obtain the Decorated Arrow. Descend the ladder and return to the door you previously skipped. A new archer and zombie now occupy the walkway. It is advisable to ignore them, as they will be replaced when you return for a third time.
At the far end of the room stands a towering statue, while a locked chest rests at its feet. Proceed towards the rear chamber located behind the statue and retrieve the Great Arrow. Suddenly, the door locks! To outsmart the trap, place the Decorated Arrow on the pedestal, fooling the mechanism and causing the door to unlock, along with the chest. Open the chest to obtain the Green Key, then exit the room. Make your way back to the locked door and utilize the Green Key to unlock it, granting access to the dock. Descend the ladder and board the boat, which will transport you to the building situated in the middle of the lake.
Kaede, from the window, bears witness to Samanosuke’s battle against the grotesque Insect Queen. Contrary to initial expectations, this battle is not as daunting as it may seem. The key lies in alternating between the Matchlock and the Shippuu. When the insects draw near, employ your Wind attack to tear them apart or at least push them back. It is important to note that you will never be able to eliminate all the insects, as the Queen will continuously summon new creatures. Hence, concentrate your attacks on the Queen herself, utilizing your Matchlock. By this point, you should have ample ammunition, but in the event you run out, you can always resort to regular or fire arrows.
Once the Queen has been vanquished, an exhilarating cinematic sequence ensues. You can now retrieve your new Great Bow and Great Arrow and return to the Demon Gate. Utilize the Great Bow to aim at the center of the barrier and dispel the force field. With the barrier dissolved, you can now enter the colossal doors and venture into the Dark Realm.
Dark Realm
This level is brief yet filled with intense combat. Upon entering, you will encounter the eccentric Demon Scientist, whom you previously encountered at the beginning of the game. He will summon Marcellus, an enhanced version of the warrior you faced on the keep’s rooftop earlier. Marcellus now possesses greater power and wields a formidable shield for protection.
The initial step is to unleash a series of Fire attacks to break through his shield. Once his defense is compromised, Marcellus will initiate charging attacks. Block his charges and combos while unleashing Thunder attacks and any remaining Fire attacks to ultimately defeat him. Return to the entrance door and open the chest to acquire some Medicine. Proceed to the opposite door and enter the next room.
This eerie room contains a Magic Mirror and a Magic Well. You can also obtain the Dark Realm Map, although you may not require it at this stage. Assuming you have already completed the Dark Realm Arena and possess the Bishamon Ocarina, now is the opportune time to play it and unveil the secret door. Enter this concealed room and claim your reward—the formidable Bishamon Sword.
Proceed through the only remaining door and descend the spiral ramp, leading deeper into the depths of the demon underworld. Engage in battles against various tentacle creatures as you progress towards the bottom. Pick up a pair of Medicine kits and enter the long hall that leads to the final confrontation.
As anticipated, the final boss is exceptionally challenging, demanding the utilization of all your skills to emerge victorious. The serpent boasts several attacks, each preceded by a visual clue, enabling you to take appropriate defensive actions. When the serpent lowers its head, be prepared to sidestep the flames as it breathes fire. It will also unleash magical fire attacks from above. Observe the floor to anticipate where they will land and swiftly move out of harm’s way. Employ the powerful magic attacks of your Bishamon Sword to subdue the serpent. Beware of its formidable claws—if it seizes you, it will gradually drain your life. Rapidly press the attack/block buttons to attempt to break free before succumbing. Utilize your medicine and herbs wisely, and with any luck, you still possess the Talisman that can restore you to full health in the event of an untimely demise. Good luck, and enjoy the concluding cinematic sequence.
CONGRATULATIONS! You have vanquished the forces of evil, rescued the princess and the young boy. However, at what cost… To have these questions answered, you must eagerly await the thrilling sequel.
Dark Realm Arena
The Dark Realm presents a formidable set of 20 levels, encompassing battles against every type of monster found in the game. Upon completing each level, you are faced with a choice: venture deeper into the Dark Realm or return to the surface. Opting to return will require you to restart the entire challenge. With dozens of deadly monsters to confront, it is crucial to maintain a plentiful supply of health items. While a few of these items can be discovered as you delve further into the Dark Realm, it is advisable to possess at least 2 Medkits and 5-7 Herbs.
As a reward for conquering this arduous trial, you will obtain Flourites #18-20. I have assigned these three Flourites the last numbers in the sequence to maintain consistency, as the timing of your visit to the Dark Realm remains uncertain. Upon successfully completing all 20 levels and safely returning to the surface, you should have accumulated sufficient Soul Energy to maximize the enhancement of any remaining Swords and Orbs, with some to spare for upgrading your arrows, bullets, and herbs. Your ultimate prize awaits on Level 20 of the Dark Realm. Within a chest lies the Bishamon Ocarina, a mystical flute granting access to the most powerful weapon in the game.
Below, you will find a comprehensive guide detailing each level of the Dark Realm, including the adversaries you will face and the discoveries to be made:
| Level | Monsters | Treasure |
|---|---|---|
| 1 | Peasant Zombies | None |
| 2 | Blue 3-Eyed Ninja | None |
| 3 | Peasant Zombies/Red Undead Samurai | None |
| 4 | Red Undead Samurai | None |
| 5 | 3-Eyed Ninja/Red Undead Samurai | None |
| 6 | Spiked Demons | Flourite #18 |
| 7 | Insect Warriors | None |
| 8 | Spiked Demons/Soul Suckers | None |
| 9 | Spiked Demons/Bull Ogres | Medicine |
| 10 | Bull Ogres/Soul Suckers | Flourite #19 |
| 11 | Tentacle Creatures | Soul Absorber |
| 12 | Tentacle Creatures/Soul Suckers | None |
| 13 | Tentacle Creatures/Insect Warriors | Talisman |
| 14 | Cloaked Ninja | Herb |
| 15 | Cloaked Ninja/Tentacle Creatures | Flourite #20 |
| 16 | Black 3-Eyed Ninja | Herb |
| 17 | Blue Undead Samurai/Red Undead Samurai | None |
| 18 | Black 3-Eyed Ninja/Cloaked Ninja | Herb |
| 19 | Blue Undead Samurai/Black 3-Eyed Ninja | None |
| 20 | Bull Ogres/Cloaked Ninja | Bishamon Ocarina |
Conclusion
Our detailed review of the Onimusha Warlords walkthrough has uncovered a captivating and immersive gaming experience that transports players to the feudal world of Japan. With its rich storyline, challenging gameplay, and intricate puzzles, Onimusha Warlords offers a thrilling adventure for fans of action, exploration, and samurai combat. The comprehensive walkthrough serves as an invaluable guide, providing players with the tools and strategies needed to navigate treacherous landscapes, conquer formidable enemies, and uncover hidden secrets. From mastering the art of swordplay to acquiring powerful artifacts, this walkthrough equips players with the knowledge and skills necessary to emerge as true samurai heroes. Whether you’re a fan of the series or new to the game, the Onimusha Warlords walkthrough offers a rewarding and immersive gaming experience that will leave you craving for more.